Probe compensation is sometimes neglected on the theory that it has already been done or that it is not important because the circuit under investigation is not operating at a frequency high enough for impedance mismatch to be a factor. This can be a fatal error if accurate measurements are needed.
In a real-life application, any inaccuracy can exponentially increase because of unknown factors introduced into the measurement equation. So it is best to begin with a fully compensated measurement setup. When a probe is used, its capacitive reactance, which decreases with frequency, must be substantially equal to that of the oscilloscope input. Due to manufacturing tolerances, which can never be perfect, and the cumulative effect of aging, the capacitance as read at the inputs may differ a slight amount for each channel, and the resulting mismatch causes waveform distortion that increases at higher frequencies.
It must be further understood that even when the overall frequency is not particularly high relative to the bandwidth of the instrument and probe, certain waveforms have high-frequency components that produce the same effect. An example is the square wave. Viewed in the time domain, the abrupt rise and fall times are seen as nearly vertical lines. In the frequency domain, it is easy to see that there are powerful harmonics that arise at frequencies that are multiples of the fundamental.
Most oscilloscopes have terminals on the outside of the enclosure that provide square-wave and ground connections for the purpose of probe compensation. The terminals are shaped such that probe hook-tips and ground-return-lead alligator clips can reliably connect to them without danger of short circuit. In some oscilloscopes, these terminals are live only while the probe is being compensated. In others, the square wave is always present and can be used for troubleshooting or for display in another oscilloscope.
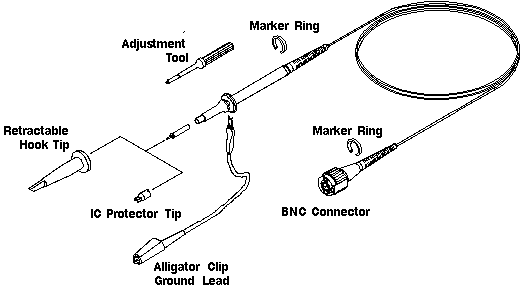
Most oscilloscopes are supplied with the same number of passive probes as there are analog input channels. Because each probe has to individually match each channel, colored rings matching the dedicated channel colors are supplied. They can be attached to each probe as it is compensated to a channel.
Bench-type oscilloscopes typically have probe leads that attach to the analog inputs by means of BNC connectors. Tektronix MDO3000 series bench-type oscilloscope probes have specialized large box-like ends that snap in place. These are known as TPP1000 probes and the attenuation is 10:1, meaning the input at the oscilloscope is one-tenth the voltage at the probe input. (Attenuation is the inverse of amplification.)
This type of probe is automatically compensated when the user presses a sequence of soft keys as specified in the manual. First, connect the probe to the desired analog input channel. Fasten the probe, using a hook tip, and the ground return lead to the compensation terminals, taking care to observe correct polarity. Activate the channel to which the probe is connected by pressing the numbered button. In the menu that shows up below the display, the second menu item — which has a black background indicating that it is not currently linked to the soft key — announces that the termination is determined by Probe TPP1000 or whatever probe is recognized as connected.
To proceed with the probe compensation, press the soft key associated with More. Press More repeatedly until Probe Setup is highlighted. Then, in the menu that becomes visible at the right of the display, the probe type is again indicated, along with its attenuation. If it has been previously compensated to the connected channel, it will be so indicated. Pressing Autoset, you can see what the square wave looks like. Next, press the soft key corresponding to Compensate Probe. Then press OK Compensate to complete the action. A window will appear announcing whether or not the compensation has succeeded. If it fails, most likely either the probe tip or ground return lead is not making a good connection.
When compensating a TPP1000 probe on the MDO3000 Series oscilloscope, each compensation generates values for a specific probe-channel combination. To compensate a probe to a different channel, run a new compensation for that combination.
Each channel is capable of storing compensation values for 10 individual probes. Therefore, you may want to compensate all probes for all channels. If you try to compensate an eleventh probe to a given channel, the oscilloscope will delete the data for the least-recently used probe and add values for the new probe.
Other types of oscilloscope probes must be manually adjusted. In a manner similar to the Tektronix oscilloscope, connect the probe to the compensation terminals on the outside of the enclosure, again taking care that the connections are firm and the polarity is correct. (Never connect more than one probe to the compensation terminals, or the internal circuitry will overload.) Activate the channel and press Autoset if necessary to view the square wave. Adjust the probe until a well-formed square wave is seen, neither over-compensated nor under-compensated.

Manually compensated probes typically have either screwdriver or lock ring compensation provisions. The screwdriver adjustment will be either on the probe body or on the probe connector. An insulated screwdriver should be used to minimize capacitive coupling across the screwdriver handle. Some probes have a lock-ring setup. The lock ring is loosened so part of the probe can be turned to adjust the compensation, all the while watching the square wave in the oscilloscope display. When a well-formed square wave is observed, the lock ring is tightened.
 Many oscilloscopes probes have a slide switch that permits the attenuation factor to be set at either 10 or 1. Because the oscilloscope is autoranging, it will adjust itself to the proper amplitude setting and triggering values when the Autoset button is pressed. In the X1 setting, the resistive and capacitive load on the circuit increases greatly, so caution must be observed. Furthermore, the higher attenuation rate provides a degree of protection to the oscilloscope for overvoltage.
Measurement errors can also arise when the ground return lead is excessively long. When connecting to high-frequency signals, this conductor should be as short as possible because it introduces inductance into the circuit in proportion to its length. In conjunction with high frequency, inductance makes for inductive reactance and signal distortion.
The oscilloscope probe along with its leads constitutes a high impedance in parallel with a high capacitance. So the end result is a high-Q resonant circuit, which will produce ringing, visible in the display and misleading if one were to assume it had something to do with the circuit under investigation. Use a short ground return lead and avoid letting it coil. Also avoid any nearby iron, which is highly permeable to magnetic flux and magnifies the inductance. A screw or nail hidden below the bench surface could be an offender. A nearby ac power cord or fluorescent ballast can cause distortion problems as well.
In a high-frequency environment where ringing and loading are persistent problems, it may be necessary to go beyond the passive probes generally included in the original oscilloscope package. Active probes should be considered. (The Tektronix TPP1000, as the letters indicate, is a passive probe.)
In most applications, the lower-cost and more durable passive probe is a good choice. But if accurate measurement of a high-frequency signal is the priority, an active probe is preferable. Active probes are characterized by higher bandwidth and in highly sensitive situations an additional advantage is reduced circuit loading.
If the frequency is not excessive, the probe parameter most responsible for loading (and therefore altering the behavior) of a circuit is primarily the dc resistance, which in a passive probe is quite high. The probe and oscilloscope are invisible. At higher frequencies, this resistance, which is in parallel with the probe’s capacitive reactance and in series with any inductive reactance, is added vectorially and constitutes the overall impedance. It may become decisive.
Passive and active probe qualities are in manufacturer data sheets. If the circuit qualities are known, it is a simple matter to crunch the numbers and determine in advance which probe is appropriate for the contemplated measurement.

Leave a Reply
You must be logged in to post a comment.