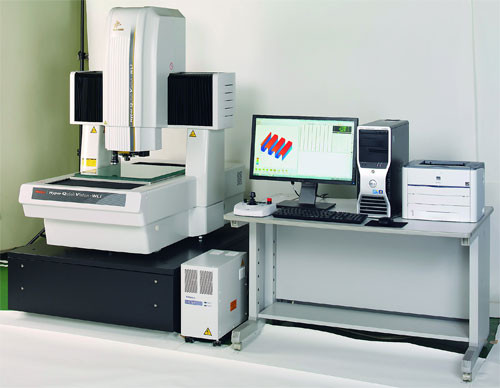
Mitutoyo America Corporation announces release of the new Quick Vision® WLI vision measuring machine. Besides an optical vision head, the Quick Vision® WLI also incorporates a white light interferometer (WLI) head. Together these heads enable high accuracy performance of non-contact vision plus non-contact 3D measurement of high aspect-ratio minute form (Z = Sub µm ~ 100µm) functions in a single machine – eliminating the need to move a workpiece from one type of machine to another.
As a result, the Quick Vision® WLI offers a significant throughput improvement for non-contact measurement of items combining both 2D and minute form 3D features in a single workpiece – example subjects could include IC chips and packages, hybrid chassis, lead frames, and many types of precision machined and molded parts.
The Quick Vision® WLI interferometer head splits a beam of white light in two; one beam goes towards a reference mirror and the other beam goes to the workpiece. As the reference objective is moved along the Z-axis, a white “interference ring” is observed on the focus point; analysis of this ring makes it possible to determine the 3D shape of the feature under observation.
The Quick Vision® WLI performs 2D/3D form evaluation using Mitutoyo FORMPAK-QV/FORMTRACEPAK-PRO software which features a refined, intuitive GUI. Results can be displayed in 2D/3D graphics for easy interpretation; a variety of editing and control tools are standard.
In addition, new Quick Vision® WLI 2D/3D non-contact measuring machines can support output to measurement data applications such as MeasurLink®, Mitutoyo’s proprietary statistical-processing and process-control program which performs statistical analysis and provides real-time display of measurement results for SPC applications. The program can also be linked to a higher-level network environment for enterprise-wide functionality.
Mitutoyo America Corporation
www.mitutoyo.com


Leave a Reply
You must be logged in to post a comment.